BBC Radio on the Raspberry Pi controlled with a tiny web server
Objective
I wanted to be able to tune in to BBC radio stations on my Raspberry Pi and control it through my smart phone with an easy graphical interface.
In fulfilling this objective I got a bit carried away and wrote a small web server from scratch (as you do…) which was good fun, so in the spirit of helping people hack their Raspberry Pis I thought I’d explain how it all works. What follows is mostly an explanation of how web servers and web browsers work: it’s actually quite simple and interesting to mess around with. The actual software is useful and works well too!
The screenshot below shows the final interface.
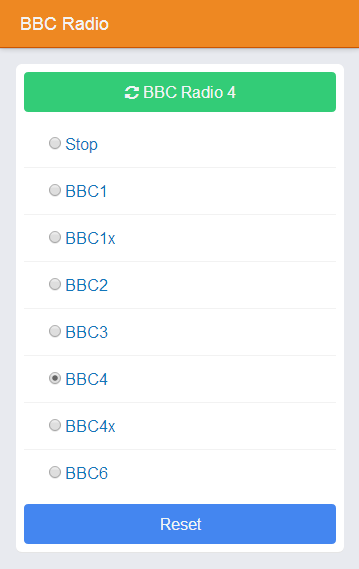
Screenshot of radio player interface
The TL:DR version
Log in to your RPi, get the code from github, unpack it, install it and go to your Raspberry Pi (port 80) in a web browser:
$ cd /tmp
$ wget https://github.com/scp93ch/raspberry-radio/archive/master.zip
$ unzip master.zip
$ cd raspberry-radio-master
$ sudo ./install.sh
However, running random downloaded scripts as root on your computer is not generally a good idea, so read on to find out what it’s all about.
The radio server also works nicely with Volumio (my current favourite DLNA renderer) as they both use mpd at the back end to control the audio. You do have to make one small adjustment though: change the init script (/etc/init.d/radio_server) so that the radio server uses a different port to Volumio (which uses port 80). So for instance, change line 17 of the init script to say “--port 8080” and then use this port in the URL in your web browser (e.g. “your Raspberry Pi hostname or address:8080” such as “192.168.1.10:8080”).
The radio scripts
First, you need to log in to your RPi and download the code from github. The simplest way to do with is to just download the code in a zip file but first change directory to /tmp so as to not make a mess somewhere important:
We now need to unpack the zip file and change to the new directory that is created:
In the scripts folder you will see two shell scripts: bbc_radio_update and radio
I have blogged about these two radio scripts previously. In summary, the bbc_radio_update script finds out what the latest URLs of the BBC radio stations are (they change periodically) and stores the latest URLs in a file (/var/local/bbc_radio/urls) for the radio script to make use of. You don’t need to run the bbc_radio_update script yourself: it is automatically run by the radio script when the URLs change. The radio script is the one that actually plays and stops the radio from playing. It does this using mpd which may or may not be set up to work properly on your RPi (for some clues about setting it up, see the earlier post). The radio command can be used like:
$ radio bbc4
BBC Radio 4
[playing] #1/1 0:02/0:00 (0%)
$ radio 5
BBC 5 Live Sport Extra
[playing] #1/1 0:01/0:00 (0%)
$ radio stations
BBC1
BBC1x
BBC2
BBC3
BBC4
BBC4x
BBC5l
BBC5lx
BBC6
BBCan
$ radio status
BBC 5 Live Sport Extra
[playing] #1/1 0:01/0:00 (0%)
$ radio stop
$ radio reset
Fetching station URLs...
The install.sh script copied these two scripts into /usr/local/bin and makes the directory for the cached URL file.
The web server
The radio command works nicely if you are logged in to the RPi in a terminal window but it’s not very convenient otherwise. I wanted to be able to control the radio easily from my phone but didn’t want to go to the both of creating an app for the purpose so instead I have done it through a web page.
I previously wrote a small web server for moving my Where Clock and this seemed the obvious place to start. As well as being good fun to write your own web server, the standard packaged ones (such as Apache, nginx or lighttpd) deliberately make it difficult for people using pages delivered by a web server to cause effects on the computer hosting the web server (doing so is generally considered a security breach). As this is just a web server on a Raspberry Pi running on a home network we can break some of the rules and make it run as root and execute shell commands if we want.
Simple version
The final web server I wrote got a bit complicated because I wanted to make it robust (deal with any errors), make the interface look nice (so it has to manage Javascript, CSS and web fonts), be usable (so it provides additional information to the browser) and follow REST principles (using GET and POST properly). It ended up at nearly 250 lines which is not large really but is a lot to explain. To make things easier to understand, I have cut it down into a tiny version that is not robust, pretty, usable or REST but it basically works. The file is available in the download as webserver/radio_server_simple.py. Here it is:
raspberry-radio/webserver/radio_server_simple.py (Source)
#!/usr/bin/env python

# This code is copyright Stephen C Phillips (http://scphillips.com).
# It is licensed under GPL v3.

import socket
import subprocess

# Configuration
PORT = 8080

def radio(cmd):
        """Runs the 'radio' command (which runs mpc) and IGNORES the output."""

        print "Executing: radio " + cmd
        proc = subprocess.Popen(['radio', cmd], stdout=subprocess.PIPE)
        output = proc.communicate()[0]
        print output

# This is the web page that we send back to the web browser, regardless of what is requested
body = """
<html>
<head><title>BBC Radio</title></head>
<body>
<ul>
<li><a href="/radio/bbc1">BBC1</a></li>
<li><a href="/radio/bbc2">BBC2</a></li>
<li><a href="/radio/stop">Stop</a></li>
<li><a href="/radio/reset">Reset</a></li>
</ul>
</body>
</html>
"""

# Standard socket stuff
host = ''
port = PORT
sock = socket.socket(socket.AF_INET, socket.SOCK_STREAM)
sock.bind((host, port))
sock.listen(1)  # don't queue up any requests

# Loop forever, listening for requests:
while True:
        print "Waiting..."
        csock, caddr = sock.accept()
        print "Connection from: " + `caddr`

        req = csock.recv(1024)  # Get the request from the socket, 1kB max
        print "Request: " + req

        # The lines in a request each end with \r\n and the first line is what we want
        req = req.split("\r\n")[0]

        # Requests that we want will look like "GET /radio/bbc4 HTTP 1.1"
        if req.startswith("GET /radio/"):
                cmd = req.split("/")[2] # gets everything after the "/radio/"
                cmd = cmd.split(" ")[0] # gets the part before the space
                radio(cmd) # runs the radio command

        # Generally just return the same web page
        if req.startswith("GET /radio/") or req.startswith("GET / "):
                message = "HTTP/1.0 200 OK\r\n" + \
                                "Content-Type: text/html\r\n" + \
                                "\r\n" + \
                                body
        # Any other requests (such as for the favicon) we return a 404 error code
        else:
                message = "HTTP/1.0 404 Not Found\r\n\r\n"

        # Send the message back to the web browser and close the child socket
        csock.sendall(message)
        csock.close()
Line 10: the only bit of configuration is the port number that the server is going to listen on. A port number is like a door number in a street. If you are a web browser (using the HTTP protocol) then you automatically try port/door number 80 and try to connect to it (knock on the door!). The convention is that a web server will be sitting on the other side waiting to talk to you. If there is already a web server sitting there (such as Apache or nginx running on the RPi) then you cannot have another one there as well or you wouldn’t know which one to talk to. Instead, the new web server must find an unused door/port number. Port 8080 is often used for a second web server. It has the advantage of being a number greater than 1024: only processes run by root can wait behind the low numbered ports/doors.
Line 12: we define a simple subroutine to execute the radio shell script using the Python subprocess module. We pass in the command’s argument (such as “bbc4”) grabbing hold of the standard output of the command (that you would normally see in the terminal). It prints both the command and the output.
Line 21: here is the simple web page that we will send back to the web browser for any successful request. This is a single page web server with the page embedded in the software rather than worrying about reading files from the filesystem. The page defines 4 hyperlinks all back to the same server to choose BBC Radio 1, Radio 2, stop or reset.
Line 35: getting a bit complicated here. We have to create the right sort of socket and then we “bind” that socket to the port we configured earlier. The door analogy has broken down already here… apart from that we define that we don’t allow any queues outside of the door: only 1 connection at a time.
Line 43: starts an infinite loop - one that never ends. We want the program just to continue running, waiting for requests from web browsers.
Line 45: is where it actually waits for a “knock on the door”, a connection with the sock.accept() command. When a web browser does connect the web server actually essentially says to the browser “okay, you got the right door for web pages, but you need to go down the road and speak to the guy at number 12345” or something. This is the child socket that is created (csock) and theoretically, frees up the main web server to deal with another customer. In our case, it won’t make things any faster but we still have to go through the motions of using sockets properly.
Line 48: at the child socket “door” we receive what the web browser wants to ask us - the request. A request from a web browser is quite simple:
GET / HTTP/1.1
Host: raspberry1:8080
Connection: keep-alive
Accept: text/html,application/xhtml+xml,application/xml;q=0.9,image/webp,*/*;q=0.8 User-Agent: Mozilla/5.0 (Windows NT 6.1; WOW64) AppleWebKit/537.36 (KHTML, like Gecko) Chrome/39.0.2171.95 Safari/537.36
Accept-Encoding: gzip, deflate, sdch
Accept-Language: en-GB,en;q=0.8,en-US;q=0.6
The first line says what the browser wants (it wants the page at “/” or the root) and what protocol is is using (HTTP version 1.1). Then there are a few more lines which may be helpful in some cases such as what types of content the browser will accept, what type of browser it is (Chrome on Windows in this case), whether it can deal with the content being compressed and by what method and what language the user prefers.
Line 52: all we want to know is what the browser wants to GET so we just grab the first line.
Line 55: the design of this simple web server is that GET requests for “/radio/something” will cause it to execute the shell command “radio something“. Note, executing shell commands using unchecked input from the web browser is a really bad idea in general. But, on we go… The next couple of lines extract the part of the string that we need and pass it to the subroutine to execute the radio command.
Line 61: if the request was a radio command or for the root page then we just want to return the same basic web page to the browser. To do this we have to send the HTTP header information followed by the web page we defined earlier. The header in this case is just two lines: “HTTP/1.0 200 OKrn” and “Content-Type: text/htmlrn”. Lines in HTTP must be terminated by a carriage return and a line feed (“rn”). The first line says what version of the protocol the server is using and gives the HTTP status code. The second line says what sort of content follows, in this case HTML. We then put one more empty line and then the web page.
Line 68: if the browser asked for anything else then we return a 404 Not Found code to tell it to give up on the idea. This does happen even in this limited scenario as a web browser will commonly request “/favicon.ico” (again and again) in order to display a nice icon for the site in the URL bar.
Line 71: here we actually send the message back down the child socket and then close it. The fact that we close the connection tells the browser that the end of the message has been reached. HTTP 1.1 allows for persistent connections to reduce the overhead of creating the connection every time but we’re not implementing that here!
Trying it out
To try the simple web server, choose the port you want it to run on (8080 is the default), make sure it is executable (use chmod +x) and just run it with “./radio_server_simple.py”. It will output what is going on to the terminal. Access the server from another computer using the RPi’s IP address or name, e.g. “http://raspberry1:8080” or “http://192.168.1.2:8080” and experiment! All the major web browsers now have developer modes where you can see what is going on. for Chrome, try pressing F12 and switching to the “Network” tab. You can then see the detail of all the requests and responses.
Note, if you stop the web server (with Ctrl-C for instance) and then immediately start it again the port will not have been freed by the operating system. You have to wait a short while (a few 10s of seconds) before it will run again.
Complicated version
So, what is wrong with the server above? Not much really for our purposes, but I do like to make things as good as I can so I did improve is quite a bit. If you want to open the full web server in another tab then I’ll explain the changes.
Lines 16-40: more configuration than before including some default values that can then be overwritten by command line options (try running the server with “--help” to see them.
Line 42: this server needs to be able to return more than just HTML files to the browser so it has to tell the browser what “Content-Type” it is sending back. It does this by just looking at the file extension of the file and using this hash.
Lines 51-62: we want this server to run permanently as a service so we need some proper logging so that we can find out what’s been going on with it and work out what happened if something goes wrong. This sets up a log file and logs some information. The log file is in /tmp/radio_server.log if you’ve run the server by hand or in /var/log/radio_server.log if you’ve run it using the init script.
Lines 66-114: the radio subroutine has got a lot bigger! It does the same thing initially but then does a lot of work parsing the output so that it can send a useful response to the web browser. The big change here is that the web browser will now be using AJAX calls instead of basic HTTP requests.
AJAX is what is used by almost any interactive web interface these days: if you click on a button and something in the page updates rather than the whole page reloading then that is using AJAX. Under the hood, all it actually is is the web browser still sending a normal HTTP request (a GET or a POST) but it is done through some Javascript running as part of the web page. The response that comes back is not a new page but instead is a bit of XML or JSON (or whatever actually) which the Javascript parses and acts upon.
What the proper web page for this system does is load a simple framework page and then use AJAX calls to do the rest. For instance, when the page loads it does a GET for “/stations” and the server returns some JSON that lists the available radio stations. The page then dynamically creates a button for each station.
The radio subroutine has to parse the output of the radio shell command to work out what to tell the browser. It returns a tuple of an HTTP status code and the JSON to send to the browser.
Lines 117-149: this is a new subroutine which reads a file from the file system in response to an HTTP GET request. This is the bread and butter of a web server: a browser asks for a page, it reads it from the disc and sends it back. Proper servers have caches and can do all sorts of clever things like server side includes and compression but this one is quite basic. I have though tried to make it fairly robust and deal properly with the browser asking for things that don’t exist (returning a 404) or which are outside of the area the server is supposed to be serving from (so that you cannot ask for “../../etc/passwd”) or something. Lines 145/6 are the lines where it looks at the file extension and guesses the Content-Type (defaulting to HTML). This is not a great method, but it works for us.
Lines 152-166: the socket part is a bit bigger because I have added some exception handling so that if the chosen port is already in use by another server then the error is logged and you can see what is going on.
Line 169 onwards: the main loop hasn’t changed much really. At line 183 there’s a new command to wait until the child socket is ready to be used as otherwise the Python script will sometimes try to read from the socket before the operating system is ready (a type of “race condition”). The main change is in what you might call the “API”: the commands that the browser sends to the server have changed to make them in line with the REST principles.
I’m not saying that this system definitely adheres to REST principles, in fact I am not sure how a web service that causes changes in the physical world should, but the main thing I made sure of is that any GET requests do not cause change on the server and that changes are caused through POST requests. So,
- to get a list of stations you do “GET /stations”
- to get what station is currently playing you do “GET /playing”
- to select a station, you do a POST to ”/playing”
- to reset the radio player you POST to ”/reset”
POST operations in HTTP have the address that you are POSTing to (in the header, see above) and then whereas GET requests don’t have anything in the request body, POST requests have the parameters (what you are POSTing) in the request body. This is dealt with (poorly) in the code by lines 204-210 and 217-225.
The only other addition to the web server is that it automatically keeps track of what the radio stations are called. This information is returned by mpd when you stream a station and the server records the full name of the station in the station_id hash. The full name is returned to the web browser so that it can display it in the status button.
Service init script
You can just run the complete web server in the same way as the simple one: from the command line. However, I’ve provided a so called “init script” so that the web server will start when the RPi boots. I’ve explained how these work previously.
The install script copies the web server into /usr/local/bin, puts the pages into /var/local/pages and the init script into /etc/init.d and sets it up. You may need to edit the options in the init script if, for instance, you want to change the port that the service uses.
Web pages
The web pages server by the web server are all in the pages directory and are installed into /var/local/pages.
The framework is App.js which provides a template for a web page that looks and behaves quite like a native app on a phone. I made use of a small part of the App.js framework (which has had several releases since). As it is such a simple looking web page there is actually very little apart from Javascript to do all the AJAX calls and program logic to update the browser’s view. The Javascript is all written using jQuery to make it simpler (jQuery has a lot of useful functions, especially for doing AJAX calls). I also made use of Font Awesome in order to create the spinning refresh icon.
I’m not going to explain the Javascript here (sorry) but there are a few comments in there and it is quite clearly written. If you are interested, the main file is index.html which makes use of some functions defined in main.js.
Conclusion
This “Raspberry Radio” software should give you a robust, easy to use system for getting the BBC radio stations to stream on your Raspberry Pi (or other Linux computer). I hope that by explaining how the web server works I have partially demystified a technology we all interact with every day and encourage you to experiment with the web servers and continue reading to understand it better and build your own tools. I would not however deploy a web server like one of these on a public network (e.g. the internet) as it is very likely there is a security flaw in there that could be exploited so that at a minimum someone could maliciously crash it but in the worst case take control of your machine. It’s fine to deploy it on your home network though (unless you really don’t get on with your family).
Have fun! Stephen.

Comments
Comments powered by Disqus